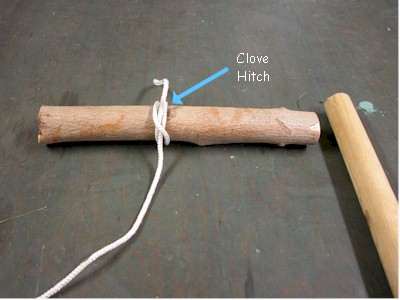
| Step 1.
Attach the rope to the first
spar with a clove hitch.
|
 |
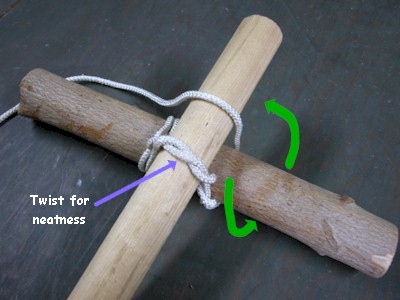
| Step 2.
Twist the loose
end from the clove hitch around the rope and then wrap the rope
around the two spars as shown. |
 |
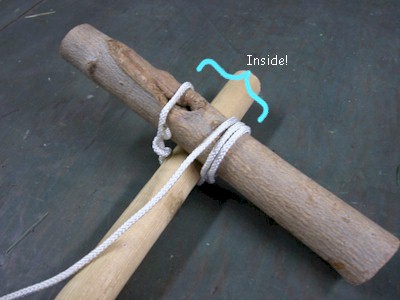
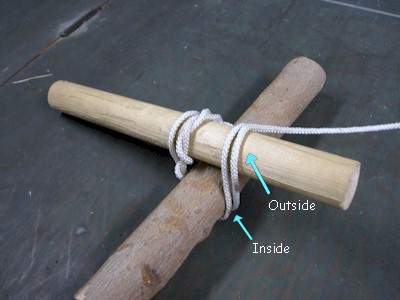
| Step 3.
When you start
the second time around, guide the rope to the inside of the existing
wraps on the first spar.
|
 |
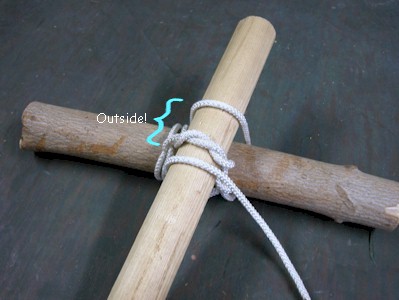
| Step 4.
On the second
spar guide the rope to the outside of the existing wraps.
|
 |
| Step 5.
Continue
wrapping the rope around the spars following the "inside -
outside" sequence.
|
 |
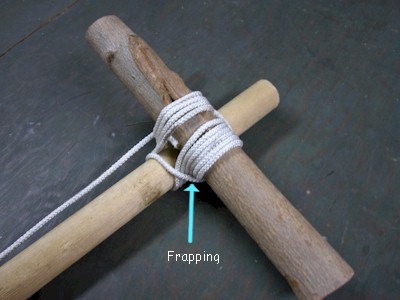
| Step 6.
Once you have
enough wraps to give you the strength you need for the project,
guide the rope horizontally between the two spars. This is called
frapping. Pull the frapping as tight as possible and then add
another turn. (If lighter rope is used 4 or 5 turns may be required)
|
 |
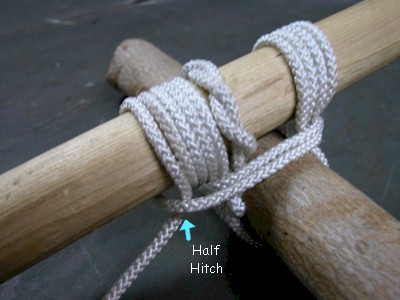
| Step 7.
Finish the
frapping by tying a half hitch. Wiggle the rope back and forth to
ensure the hitch is in as tight as possible to the frapping.
|
 |
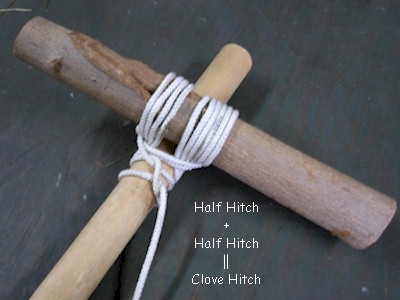
| Step 8.
Add another half
hitch to finish the job!
Note: Most knotting books call for a clove hitch to finish a square lashing. By
tying 2 half hitches you in fact have tied the required clove hitch.
|
 |
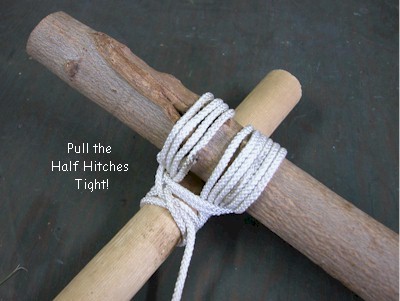
| Step 9.
The previous
pictures showed the half hitches rather loose. In reality they must
be pulled in tight to ensure the lashing does not loosen.
|
 |
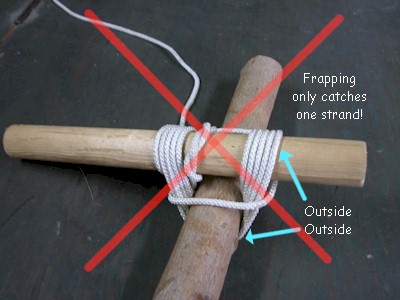
| Why the Inside
Outside rule!
If you do not
pay attention to how you lay the ropes you will generally end up
simply going to the outside. When you do that, the frapping will only
catch the outer wrap and the lashing will loosen quickly.
|
 |